Police CyberAlarm Draytek setup
Enable Police CyberAlarm access with these steps…
This is a 3 step process, the first showing how to set up Syslog for Police CyberAlarm on Draytek firewalls, the second will be showing you how to set up outbound NAT, step three will be showing you how to link the outbound NAT to a SurfProtect profile (You do not need to complete steps 2 and 3 if SurfProtect is not in use)
Step 1: Setting the SysLog server
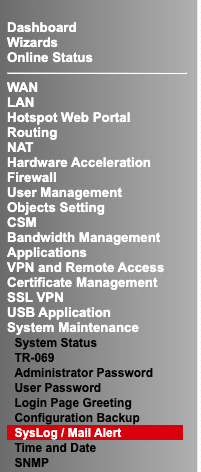
- Log into the Draytek and go to the menu section on the left. Go down to ‘System Maintenance’ and choose the ‘SysLog/Mail Alert’ section:
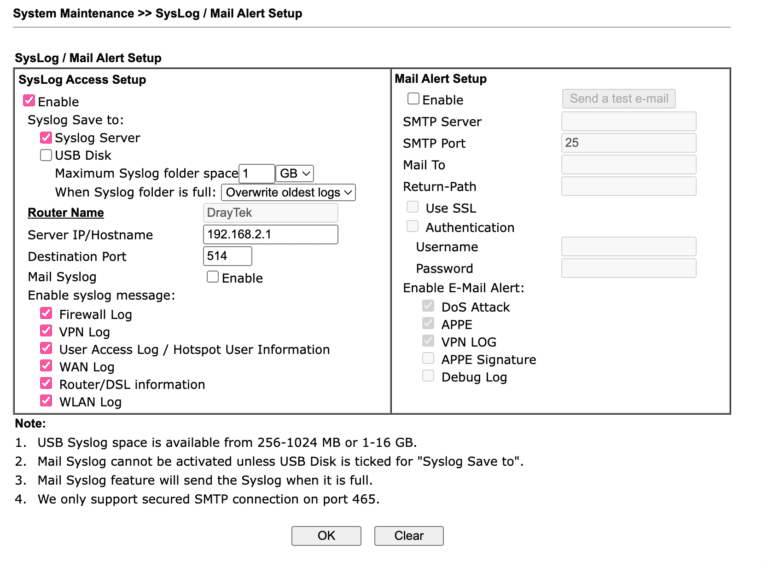
- Once there, enable the SysLog and choose the ‘Syslog Server’ option under ‘Syslog Save to’. It will ask for ‘Server IP/Hostname’ (It will need to be IP not Hostname) and choose the ‘Destination port’
Step 2: Setting up an outbound NAT
Once the SysLog has been set up, we need to do an outbound NAT. An outbound NAT means changing the WAN IP for one specific device so it is different to the WAN interface.
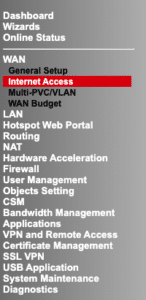
- On the Draytek Menu on the left hand side choose ‘WAN’ and ‘Internet Access’
- Depending on which WAN port is used, go into it by clicking on ‘Internet Access’. When you are on the next page find ‘WAN IP Alias’ and click it.
- Another box should appear with the IP alias’. Under the next available one, enable it and enter the External IP you will use.
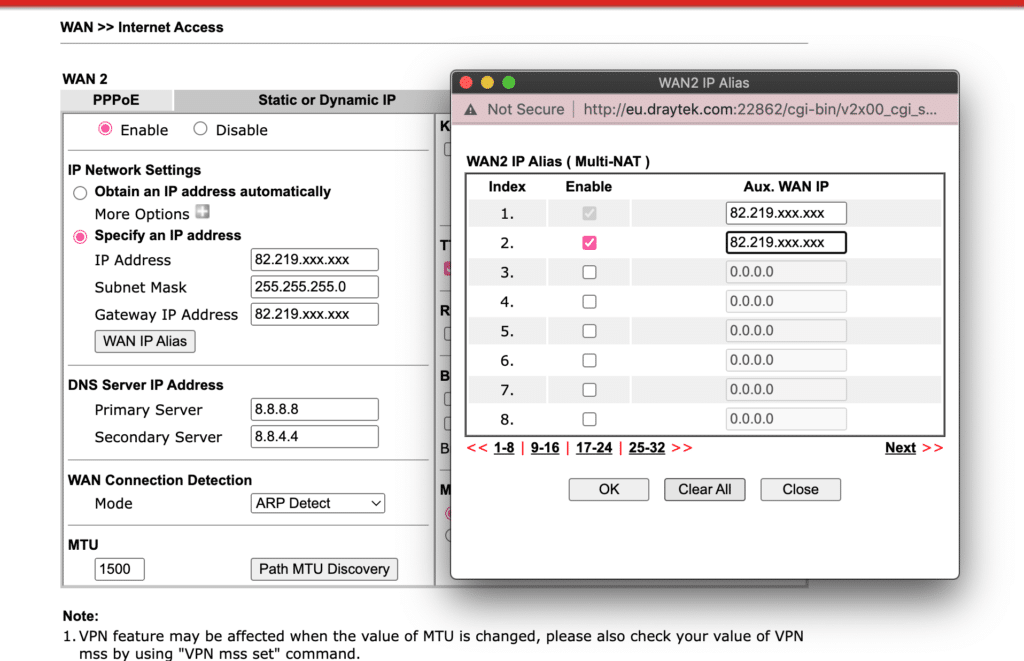
- Click ‘OK’ which will save the changes made.
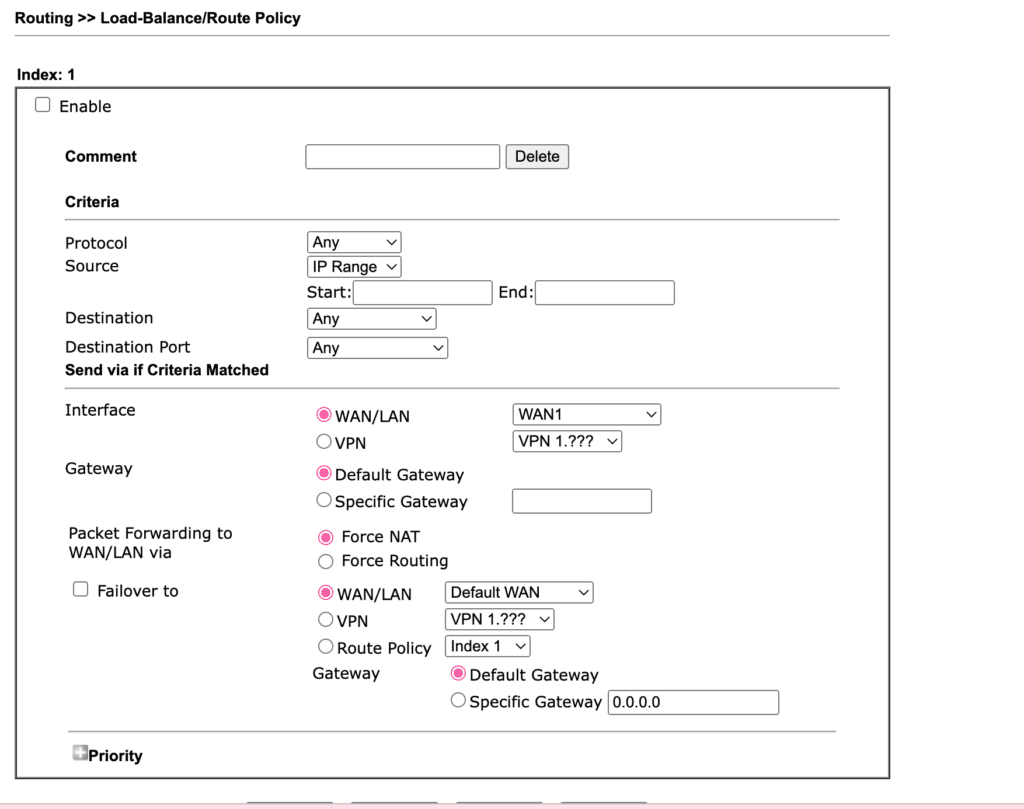
- Go to the Menu and click ‘Routing’ and ‘Load-Balance/Route Policy’
- Enable the rule and Name it ‘CyberAlarm’
- Enter the IP address of the server under ‘Source’. The rest can remain how it is.
- Under ‘Interface’ choose the correct WAN port in use and the IP address you added in WAN IP Alias will display here. Choose this.
- Save the setting by clicking ‘OK’
Step 3: Creating a SurfProtect profile
Please skip this step if you do not use SurfProtect.
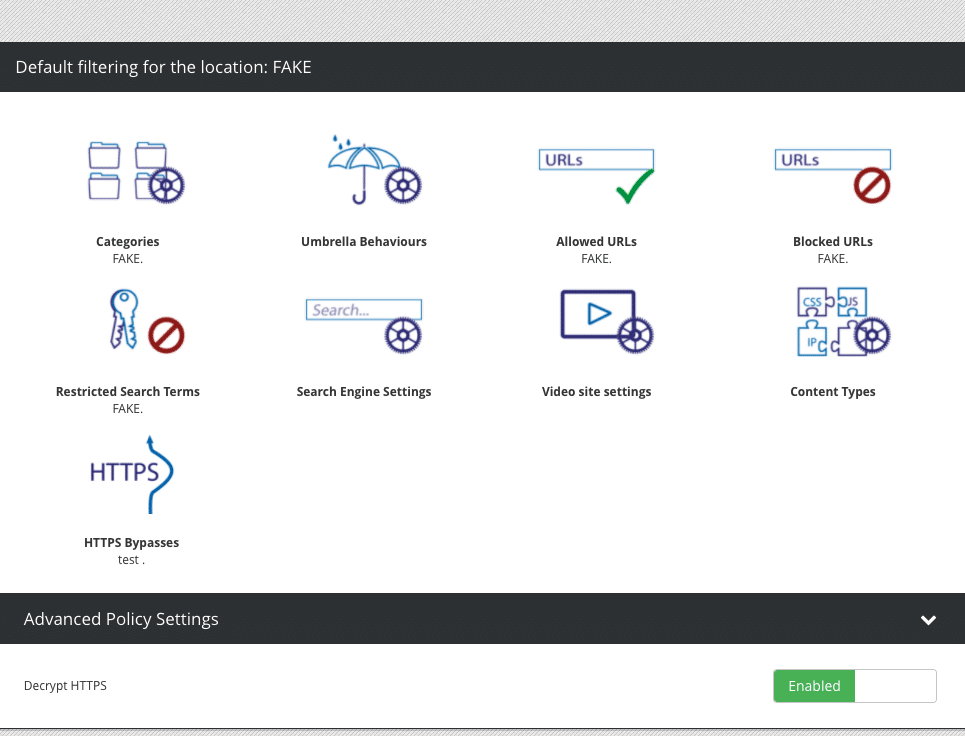
We will need to setup a SurfProtect profile which has ‘HTTPS decryption disabled’.
- Firstly, go to https://surfprotectpanel.exa.net.uk and log into the SurfProtect panel:

- Once logged in go into the profiles. This is done by clicking the blue eye next to the relevant location.
- You will see a list of profiles the school has created and the default profile. Where it says ‘Filtering profiles’ there will be a green + symbol, click on this.

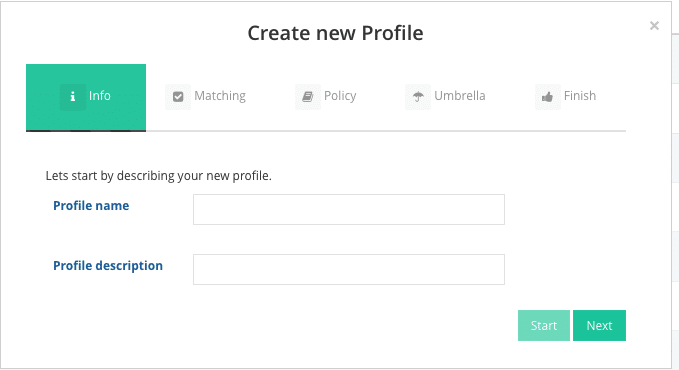
- You will see a box labelled ‘Create new profile’ pop up, follow the onscreen instructions.
- The first thing to do is name the profile. This can be called ‘CyberAlarm’
- Click ‘Next’
- You will need to configure the next bit which is ‘Matching’ here, pick the IP that we used in the 1-to-1 NAT.
- Carry on going through the onscreen instructions and create the profile.
- Once the profile has been created, go into it by clicking the ‘blue eye’ and looking towards the bottom of the page, it will say ‘Advanced Policy Setting’ and disabling the setting under there.
You should now be able to run Police CyberAlarm through your Draytek.


